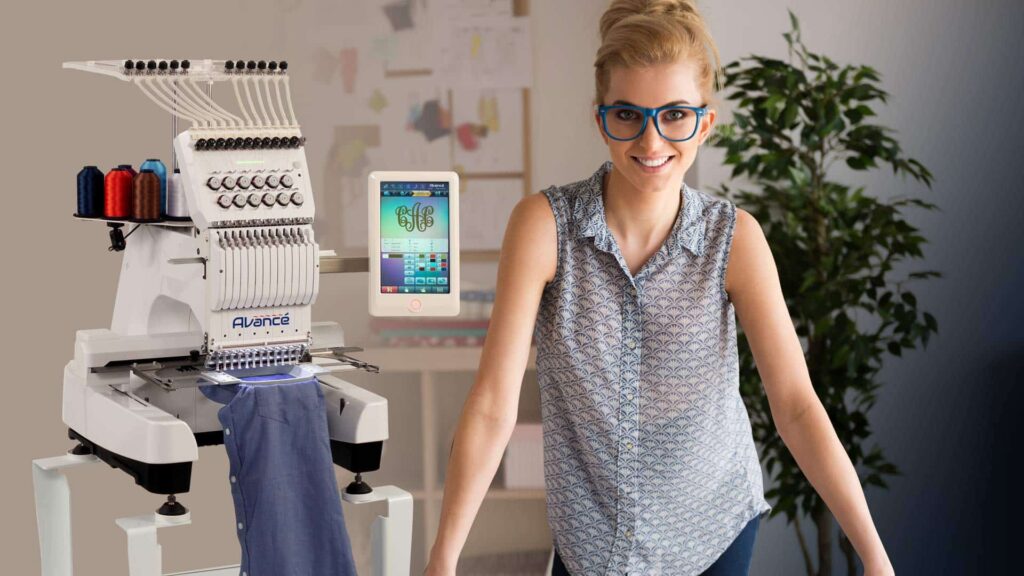
So you just got an embroidery machine. Or maybe you’ve had one sitting on your desk for months, but every time you look at it, you feel a little lost. Trust me, I have been there. You see those gorgeous, intricate designs online and think, “There is no way I can do that.” But here is the secret nobody tells you: every single one of those stunning pieces starts with just a handful of simple moves. You do not need to learn a hundred different techniques at once. You just need the core building blocks. And that is exactly where we start today. Let’s talk about Basic machine embroidery stitches. These are your new best friends. They are not scary. They are not complicated. They are just small, repeatable actions that your machine handles for you. Your only job is to understand what each stitch does best.
I am going to walk you through the most common machine stitches you will actually use as a beginner. No fluff. No confusing manuals. Just real talk and practical advice. By the time you finish reading, you will feel ready to sit down at your machine and actually make something pretty.
Why Bother Learning the Basics First?
Look, I get the temptation. You want to jump straight to a floral monogram or a detailed portrait of your dog. But skipping the foundation stitches is like trying to bake a three-tier cake without knowing how to turn on the oven. It gets messy fast. When you take twenty minutes to learn what each basic stitch does, you save hours of frustration later. You also stop wasting expensive thread and fabric.
Plus, knowing these stitches gives you confidence. You stop guessing which setting to use. You start making choices on purpose. That small shift changes everything. Suddenly you are not just following directions. You are actually designing.
The Straight Stitch: Your Absolute Anchor
Let us start with the simplest one. The straight stitch. This is the default setting on almost every machine for a reason. It does exactly what it sounds like. It creates a single, unbroken line of thread. Think of it as the pencil of the embroidery world. You use it for outlines, for lettering, and for any time you need a crisp, clean edge.
Here is how you use it well. Set your stitch length somewhere between 2.0 and 3.0 millimeters for most fabrics. A shorter length gives you a denser line. A longer length looks more like a basting stitch. For a standard outline on cotton, stick to 2.5. Do not overthink it. Your machine moves the fabric. You just steer. Practice drawing a simple star shape using only straight stitches. It feels oddly satisfying, like tracing with thread.
The Zigzag Stitch: Not Just for Edges
A lot of beginners ignore the zigzag stitch because they think it looks messy. Big mistake. This stitch is incredibly useful. The needle moves left and right as it sews forward. That simple motion creates a wide, flexible line. You use zigzag stitches to attach patches, to create textured fills, and most importantly, to prevent fabric edges from fraying.
Here is a pro tip for you. Lower the stitch length to 0.5 and keep the width narrow. This creates a satin stitch. A satin stitch looks like a smooth, solid block of thread. You see this all the time in store-bought patches and lettering. Experiment with different widths. A wide zigzag makes a great decorative border on a tote bag. A narrow, tight zigzag makes beautiful small leaves. Do not be afraid to play.
The Running Stitch vs. The Straight Stitch (Yes, They Are Different)
People mix these up all the time. Let me clear it up right now. On a sewing machine, the straight stitch we just talked about is continuous. The needle goes down, the fabric moves, the needle comes up. No gaps. A running stitch, in machine embroidery terms, usually refers to a stitch with intentional small gaps between each puncture. You see this in quilting and in some freestyle embroidery.
For most home machines, when you select an embroidery-specific running stitch, your machine creates a dashed line effect. Use this for temporary guides, for delicate outlines on sheer fabric, or when you want a sketchy, hand-drawn look. It uses less thread and leaves your fabric softer. If you are making a lightweight scarf or a piece of lace, reach for the running stitch first.
The Satin Stitch: Where Things Get Pretty
Now we are talking. The satin stitch is the reason machine embroidery looks so polished. Remember how I said a very dense, short zigzag creates a satin stitch? That is the one. This stitch completely covers the fabric underneath. It looks like a raised, glossy line.
You use satin stitches for lettering, for borders, and for filling small shapes like circles or hearts. The key here is density. If your stitch length is too long, the satin stitch looks like a loose zigzag. Too short, and the thread bunches up. Start with a length of 0.4 and a width of 3.0 millimeters. Adjust from there based on your thread thickness. Thicker thread needs a slightly longer stitch. Practice making a small filled square. Then try a curved line. Curves are harder with a satin stitch because the wide stitch can bunch up on the inside of the curve. Go slow. Let the machine do the work.
The Triple Stitch (Stretch Stitch): Tough and Textured
You will see this one labeled differently depending on your machine brand. Some call it the triple stitch. Others call it the stretch stitch or the reinforced stitch. It looks like a straight stitch that goes forward two steps and back one step. The result is a very strong, slightly thicker line.
Do you plan to embroider anything that gets heavy use, like a backpack, a denim jacket, or a pillow? Use the triple stitch for your outlines. It does not break easily. It also adds a cool, slightly braided texture that looks intentional. I love using a contrasting thread color with the triple stitch on dark denim. It pops without looking too delicate. Just remember, this stitch uses more thread and sews slower. That is normal. Let it take its time.
Putting It All Together: Your First Real Project
You know the stitches. Now let us use them. Grab a piece of medium-weight cotton fabric, like quilting cotton. Hoop it firmly but not drum-tight. Thread your machine with a contrasting color so you can see your work.
Start with a straight stitch. Draw a simple house shape in the center of the fabric using only straight stitches. Outline the roof, the walls, and a door. Now switch to a satin stitch. Fill in the door with a solid red satin stitch. Use a narrow zigzag stitch to create window panes. Switch back to a straight stitch to add some flower stems below the house. Use a wide zigzag stitch to make the flower petals. Finally, take your triple stitch and sew a border around the entire house. That border will act like a frame.
Look at what you just made. Those are not random scratches. That is real machine embroidery. You used four different basic stitches together. That is the same process professionals use, just on a smaller scale.
Common Beginner Mistakes (And How to Skip Them)
Let me save you some headaches. The number one mistake beginners make is using the wrong needle. A universal needle works fine for basic sewing, but embroidery thread is softer and fuzzier. Switch to an embroidery needle, size 75/11 or 80/12. It has a larger scarf (the little indentation) that protects the thread. Your thread will break way less often.
Mistake number two is ignoring tension. If you see little loops on the bottom of your fabric, your top tension is too loose. If your fabric puckers like a raisin, your top tension is too tight. Start with your machine’s automatic settings and adjust one number at a time. Write down what works for each fabric. Your future self will thank you.
Mistake number three is rushing. Slow down. Every single stitch looks better when you let the machine feed the fabric at a steady, moderate pace. Speed does not equal skill. Patience does.
Conclusion: You Already Know Enough to Start
Here is the truth. You do not need to master twenty stitches to make beautiful things. You just need to feel comfortable with four or five. The straight stitch, the zigzag, the satin stitch, and the triple stitch. That is your starter kit. Everything else is a variation of these core movements.
So stop waiting until you feel ready. You will never feel totally ready. That is normal. Take your hoop, your fabric, and your thread. Sit down at your machine. Pick one of these Basic machine embroidery stitches and just sew a few lines. Then sew some more. Make a wonky flower. Sew a lopsided heart. None of it has to be perfect. Perfection comes with practice, and practice only happens when you finally start.
You have the knowledge. You have the guide. Now go make something. Even if it is just a straight line on scrap fabric, that line is proof that you are no longer someone who only watches tutorials. You are someone who sews. And that is a wonderful thing to be.