You have a Pfaff embroidery machine, a creative spark, and a vision for a custom logo on a hat, bag, or jacket. The only thing standing between you and that finished project is a confusing technical step: getting your digital design into a language your machine understands. This process is your gateway to limitless creativity, and it’s less daunting than you think. This beginner’s guide will demystify the essentials, showing you how to Convert Logos for Pfaff Embroidery Machines and unlock the world of custom work that awaits you.
Introduction: Your Pfaff is Waiting for Instructions
Think of your Pfaff embroidery machine as a brilliant, precise robot. You can give it a picture of a cake, but it can’t bake it. You need to provide the recipe—the step-by-step instructions for every ingredient and action. In the embroidery world, your JPG or PNG logo is the picture of the cake. The recipe is a special file called a PCS or VIP file (depending on your Pfaff model).
Digitizing is the act of writing that recipe from the picture. It’s the process of telling your machine exactly where to place each stitch, what color thread to use, and how fast to sew. For beginners, the goal isn’t to become a master chef overnight; it’s to learn how to follow a reliable recipe to bake your first successful cake. This guide is your friendly, step-by-step cookbook.
Step 1: Gathering Your Ingredients – Preparing Your Logo
The most important step happens before you even open any software. Starting with a clean, simple logo is the secret to early success.
-
Find the Best File: If you have the original design file from a designer, look for a vector file (ending in .AI, .EPS, or .SVG). This is the gold standard. If you only have a regular image, choose a high-resolution JPG or PNG with a plain background. Avoid tiny, blurry logos from websites.
-
Simplify Your Vision: Not everything that looks good on a screen stitches well. As a beginner, choose or modify your logo to be:
-
Bold and Graphic: Simple shapes with clear outlines.
-
Low Color Count: Start with 1-3 colors.
-
Free of Tiny Details: Avoid hairline strokes and text smaller than 1/4 inch tall. These will become blurry or tangled.
-
-
Clean it Up: Use a free tool like Canva or Photopea to remove any complex background. Your logo should sit on a plain white or transparent canvas.
Step 2: Choosing Your Kitchen Tools – Software Options
You need a tool to write your embroidery “recipe.” You have a few good beginner-friendly options.
1. Pfaff Creative Suite / Embroidery Software:
This is the official software made for your machine. It’s designed to work seamlessly, offering a straightforward path from image to PCS file. It might come with your machine or be available for purchase.
2. Wilcom Hatch Embroidery:
Hatch is widely praised for being incredibly powerful yet accessible. It feels less intimidating than some professional suites and has fantastic learning resources. It’s a top choice for beginners who are serious about learning.
3. Online Digitizing Services (The “Meal Kit” Option):
If the idea of learning software is overwhelming, this is your best starting point. Websites like The Digitizing or Digitized act like a meal kit service. You upload your cleaned-up logo, specify “PCS for Pfaff,” pay a small fee ($10-$25), and a professional digitizer sends you a ready-to-stitch file in 24-48 hours. It’s the fastest way to guarantee a great result while you learn the other steps.
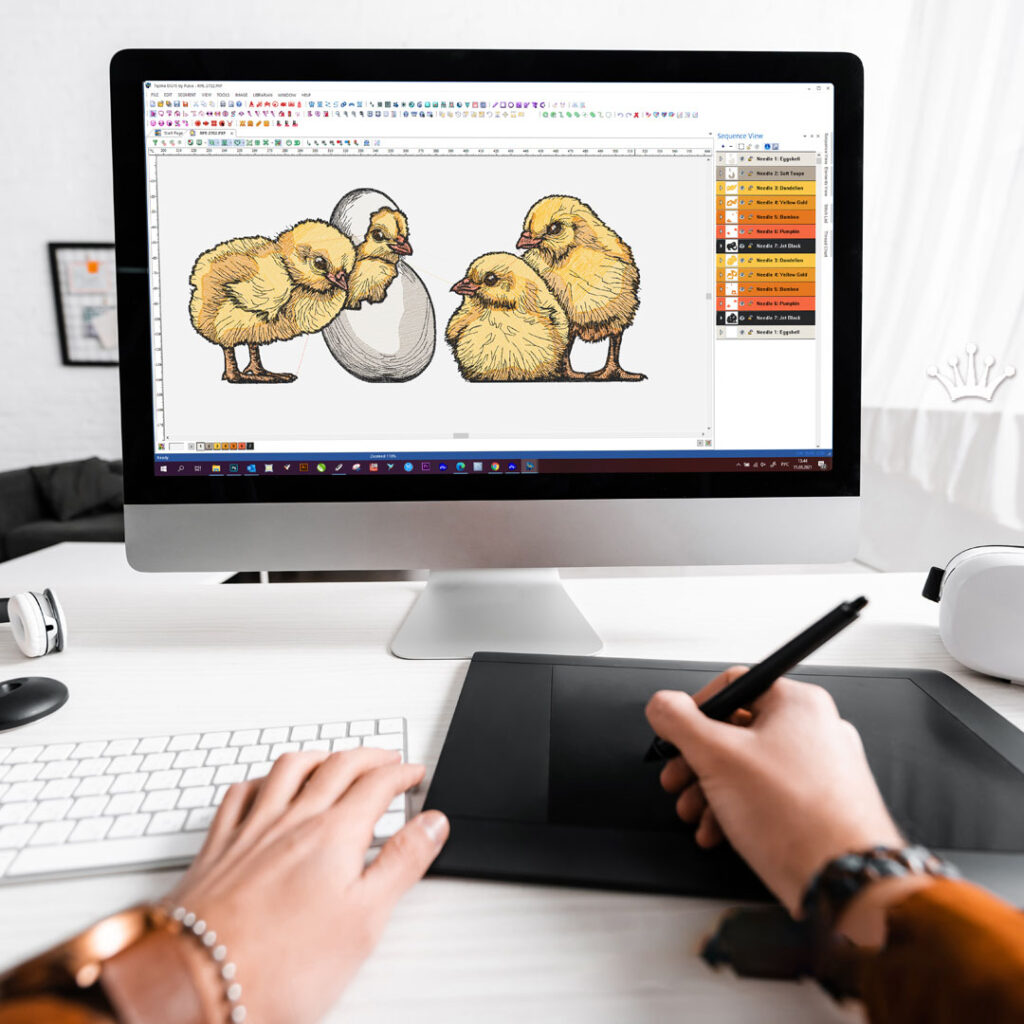
Step 3: Your First Recipe – The Basic Digitizing Workflow
Let’s walk through what happens inside the software, using the “auto-digitize” function as your training wheels.
-
Import Your Logo: Open your software and start a new project. Import your prepared logo file. It will usually appear as a picture on the digital hoop.
-
Use the “Auto-Digitize” Function (Carefully!): Find the button that says “Auto-Digitize,” “Image Stitch,” or “Quick Punch.” Click it. The software will automatically trace your logo and create colored shapes representing stitches.
Crucial Beginner Insight: The raw result will be flawed—it’s a rough draft. Your job is to clean it up. -
The Clean-Up Edit (Where the Magic Happens):
-
Simplify Colors: Reduce the number of colors in the palette to match your simple logo.
-
Change Stitch Types: The auto-function often uses “fill stitch” for everything. Select thin outlines and text and change their stitch type to Satin Stitch. This creates a smooth, glossy rope-like edge.
-
Check Size: Set the design to your desired physical size (e.g., 3 inches wide).
-
-
Add the Secret Ingredient: Underlay. This is the most important concept for beginners to learn. Underlay is a layer of loose stitching that goes down before the top stitches. It stabilizes the fabric to prevent puckering.
-
How to Add It: Select a large filled shape. Look for “Properties” or “Object Details.” Find the “Underlay” section and add a simple Center Run or Edge Run. Do this for all fill areas.
-
-
Export for Your Pfaff: Go to File > Save As. In the dropdown menu for format, choose PCS (.pcs) for most newer Pfaff models, or VIP (.vip) for some older ones (check your manual). Save this file to a USB drive.
Step 4: Taste Testing – The Non-Negotiable Test Stitch
You would never serve a new recipe to guests without tasting it first. Never stitch a new logo file on your final project item without a test.
-
Use Scrap Fabric: Hoop a piece of scrap fabric that is similar to your final project (e.g., if stitching a cotton cap, use spare cotton). Use stabilizer! This is a non-woven backing that goes in the hoop behind your fabric and is essential for clean results.
-
Run the File: Load your PCS file from the USB and stitch it out on the scrap.
-
Analyze the Results:
-
Does it pucker? You need more or better stabilizer, and you likely forgot underlay in your digitizing.
-
Are there gaps between colors? This is called “pull compensation,” an advanced step. For now, it tells you the design is very detailed.
-
Do the shapes look right? If not, your original image might have been too complex.
-
-
Try Again: Based on what you see, go back to your software and adjust. This trial-and-error is how every digitizer learns.
Common Beginner Pitfalls & How to Avoid Them
-
Pitfall: Starting with a complex photo. A detailed portrait is a Level 100 project. Start with a Level 1 project: a simple, two-color shape.
-
Pitfall: Skipping the stabilizer. Your machine embroiders thread, not magic. Stabilizer is the foundation that holds everything together. Don’t skip it.
-
Pitfall: Expecting perfection from auto-digitize. It’s a helper, not a solution. Embrace the clean-up process as part of the craft.
-
Pitfall: Not saving your work. Save your software project file (e.g., .PXF if using Pfaff software) after every change. This lets you go back and edit later.
Conclusion: Your First Step into a Custom World
Learning how to Convert Logos for Pfaff Embroidery Machines is the first, empowering step into custom embroidery. It transforms your machine from a tool that uses pre-made designs into a partner for your unique creations. Remember, every expert was once a beginner who made a few puckered test stitches.
Start simple, be patient with the process, use online services to see what a good file looks and sews like, and never underestimate the power of a good test stitch on scrap fabric. With this foundation, you’re no longer just an operator—you’re a creator, ready to stitch your vision into reality. Now, find that simple logo, and start your first digitizing project.